Dimension Date table is one of the necessary elements of each Power BI report when you are dealing with dates in your transactional database. Sometimes there is not a dim date table available in the database to import into Power BI or you probably want to apply a more efficient solution to use it. Therefore, in this article I will help you to understand how you can create a DIM DATE table in Power BI from the scratch. This approach is much more useful in terms of maintenance of reports because by renewing the year, it will update the dates for the new upcoming year. Interesting!
Read this article up to the end, and I recommend you strongly to watch the YouTube video related to this article. It helps you to understand the subject in dept.
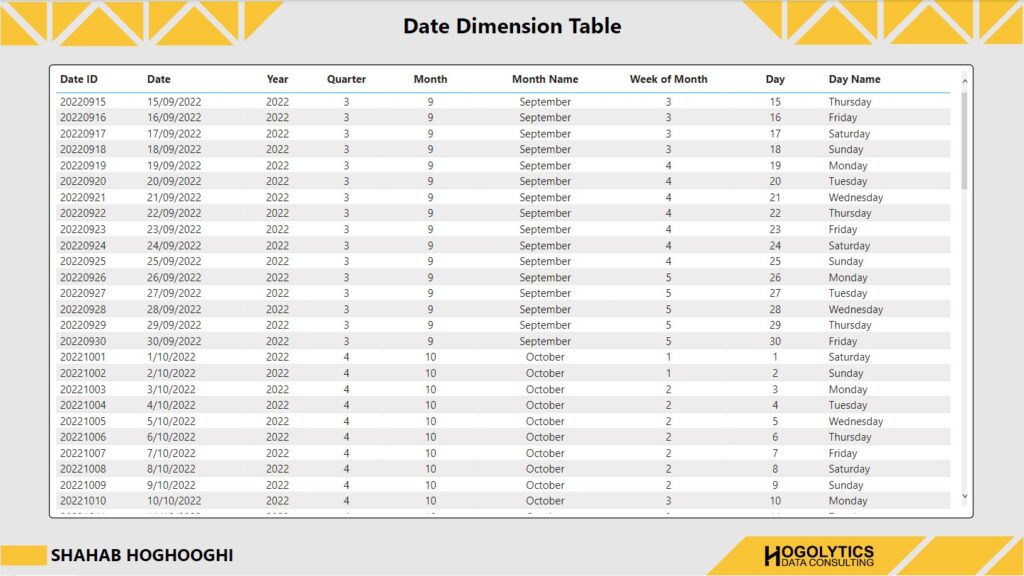
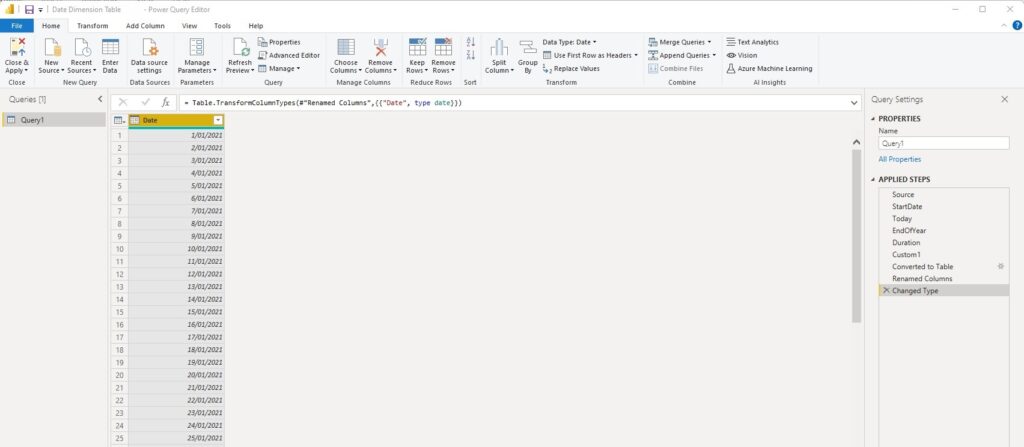
In most of the Power BI reports you need to import a dim date table like the image below. In this article I will teach you how to use M Power Query to create a Dimensional Date table. Don’t worry if you don’t have M Power Query knowledge! It’s easier than what you think!
To begin, from the Home tab click on the “Transform Data” button to open the Power Query editor.

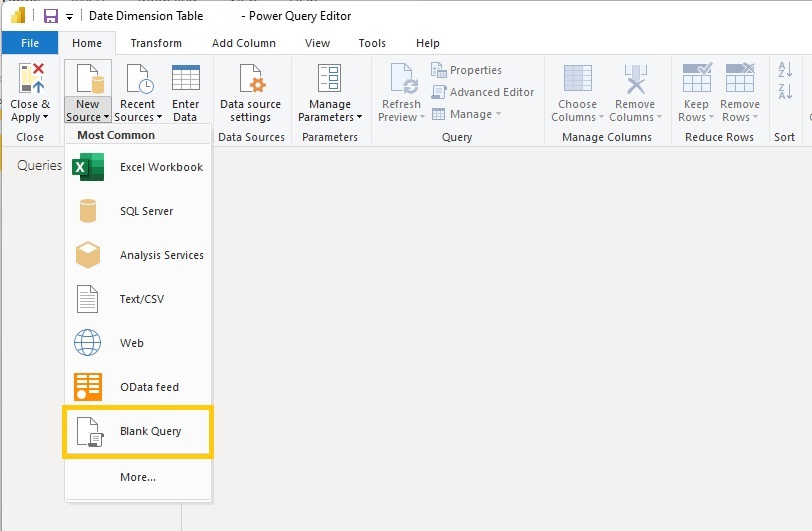
Then, in the new query section underneath of the Home tab, click on the “New Source” and choose “Blank Query” from this list.
Now it is required to add some M Power Query codes.
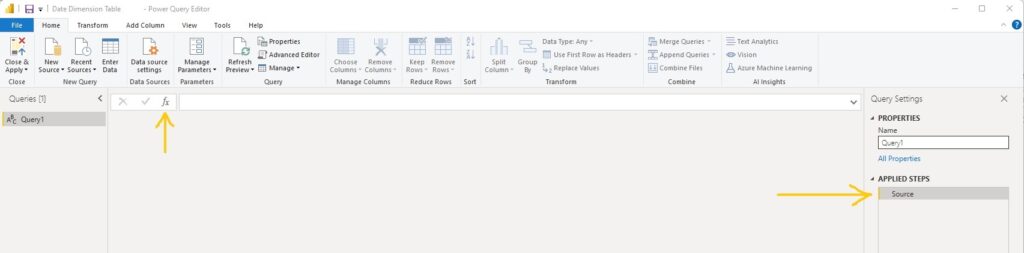
If you click on the fx or function button a new step will be appeared for you.
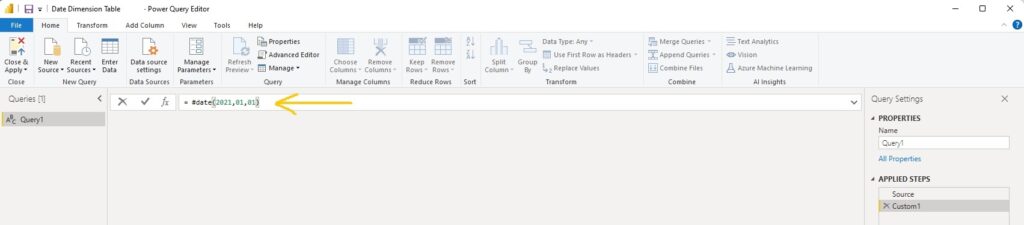
First, we want to define a start date. You can easily insert a date. For example, if your starting date is first of January 2021, then you should write #date(2021,01,01). Now if you click on the tick mark you can see the date below. Just rename the step name to StartDate.
Now, we should define an end date in the same approach. But here what I want to do is having a list of dates until the end of current year. In this way, when we go to the next year, the date table will add another one-year list.
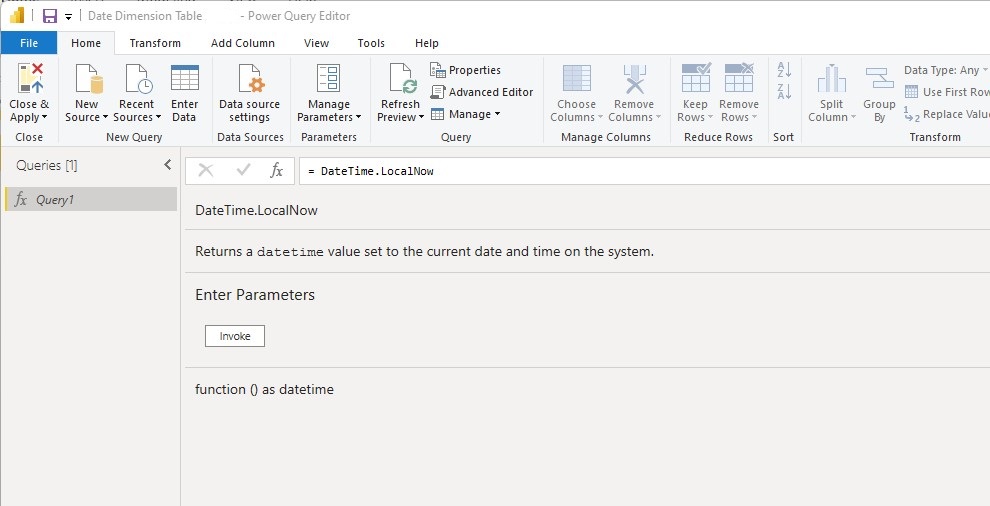
So, to achieve this goal, first we should extract today’s date. Click on fx button to add another step, and write:
DateTime.LocalNowAnd press enter.
The interesting thing about M Power Query in Power BI is if you write a code like this and press enter, it shows you a description and the parameters you need to use for this function. For the DateTime.LocalNow we should only add open and close parentheses and then press enter. Here you can see the current datetime.
Please notice that M language is a case sensitive language and you should use the correct uppercase and lowercase characters to avoid getting any error.

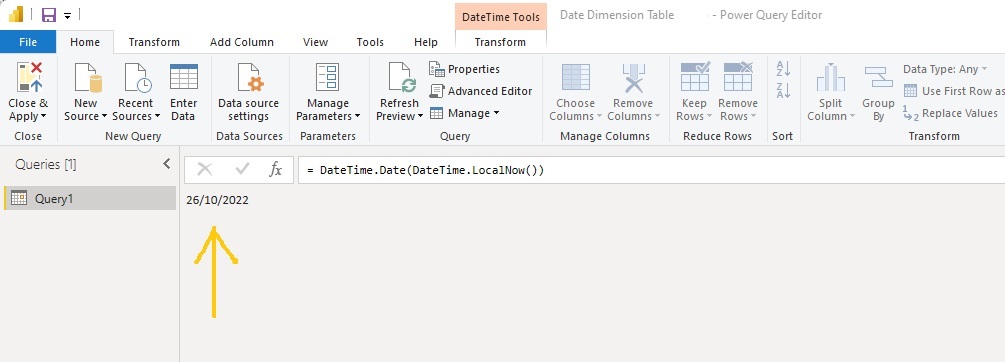
We need to extract only the date from this date time format. So, in the beginning we add “DateTime.Date” and then open the parenthesis and at the end close the parenthesis. Now we have today’s date and we can now change the step name to Today.
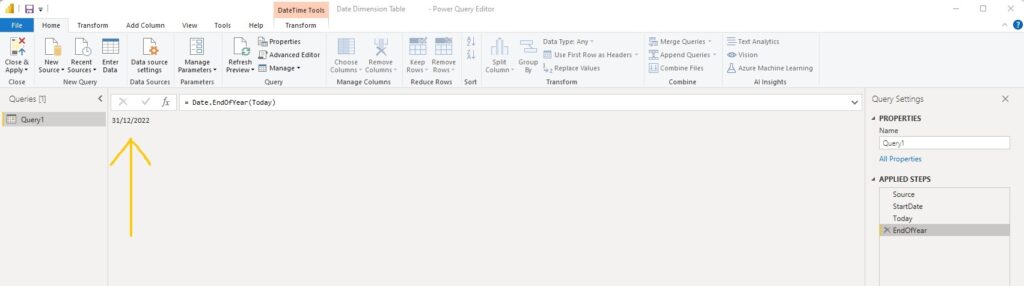
Now to extract EndOfYear we add another function and write:
Date.EndOfYear(Today)Then rename the step to EndOfYear.
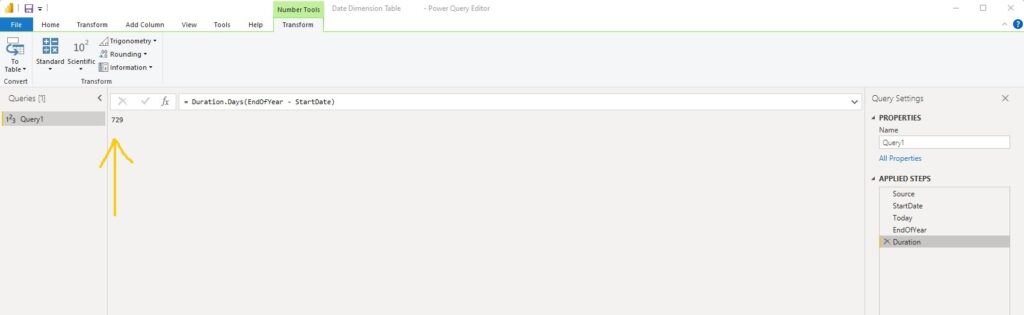
Next, we should find out the count of days between the StartDate and end date which is EndOfYear here. So, we write:
Duration.Days(EndOfYear – StartDate)And we change the step name to Duration.
Now, it’s the time to create a list of dates between these two dates. To do that, add a new function, and write:
List.DatesPress Enter
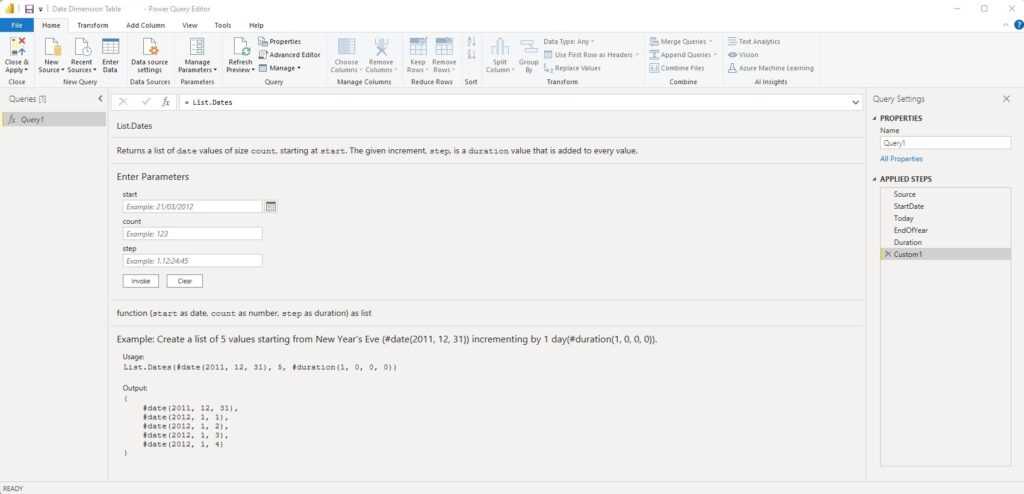
You can see in the description this function needs startdate, the count of days and steps to add. The steps her is one day, and so it should be #duration(1 as day, 0 as hour, 0 as minute, and 0 as second, and close the parenthesis.
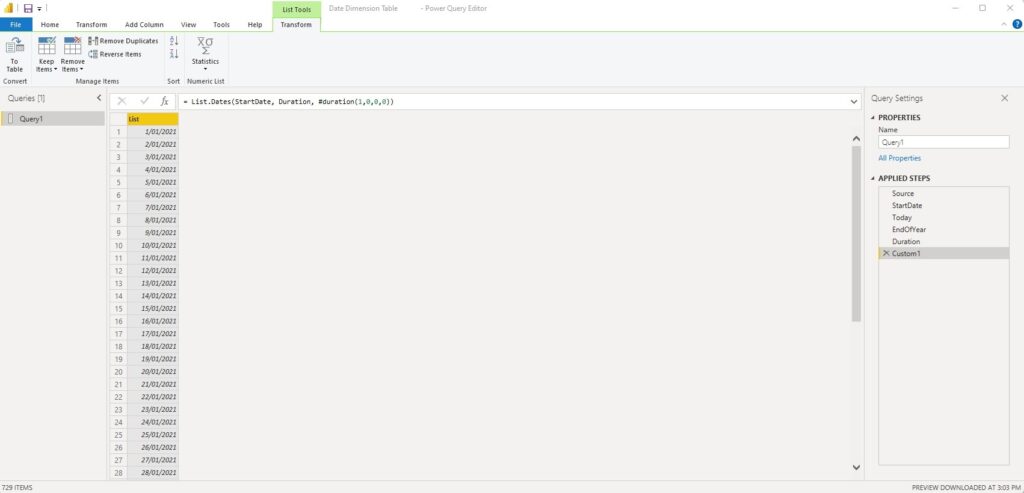
So, here we should write:
List.Dates(StartDate, Duration, #duration(1,0,0,0))Now you can see a list of dates from the start date to the end of current year.
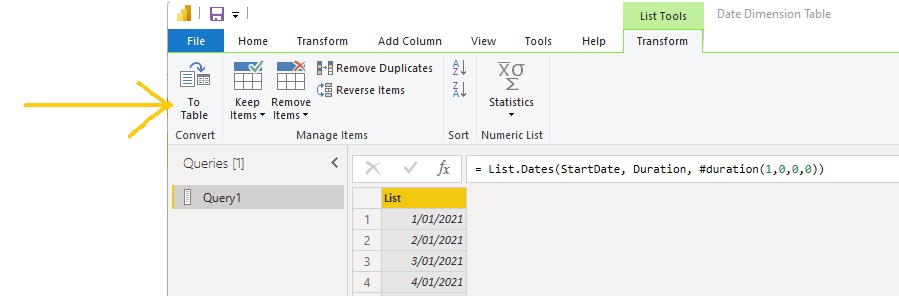
It’s required now to convert this list to a table and add other columns to complete the Dim Date table. To do this, on top left, from the Transform menu, you can press “To Table button”. Now we should first change the format to date and rename the column to “Date”.
Date ID
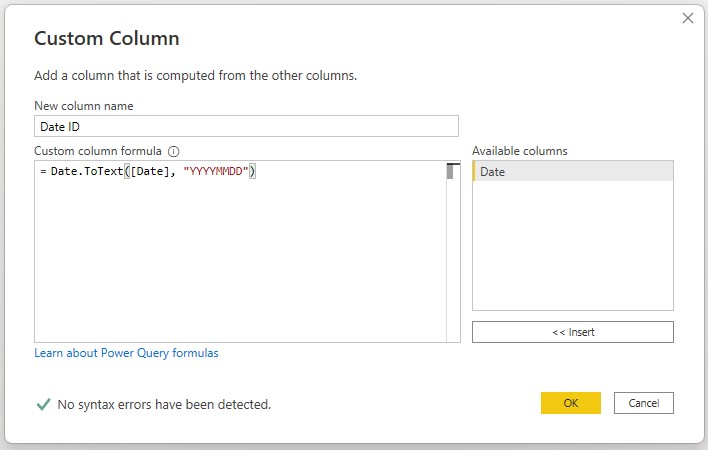
In most of the datasets you enter, you usually have Date ID or Date Key column instead of Date. And we need to add this column for the joins between your Fact tables and this Dim Date table.
To do this, from the Add column tab, choose custom column and change the name the new column to Date ID and in the formula write:
Date.ToText("Date", "YYYYMMDD")Click on OK and now you have a Date ID column.

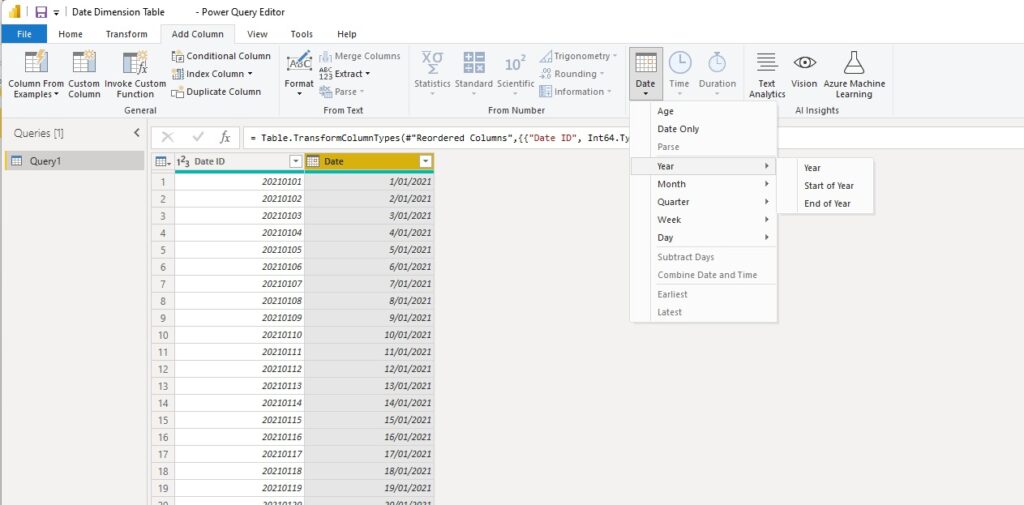
Add Other Date Related Columns
To create other columns, you can easily go to Add Column tab, click on Date column, and from Date & Time Columns, click on Date and choose different options, such as year, month, month name, day, day name, and so on and so forth.
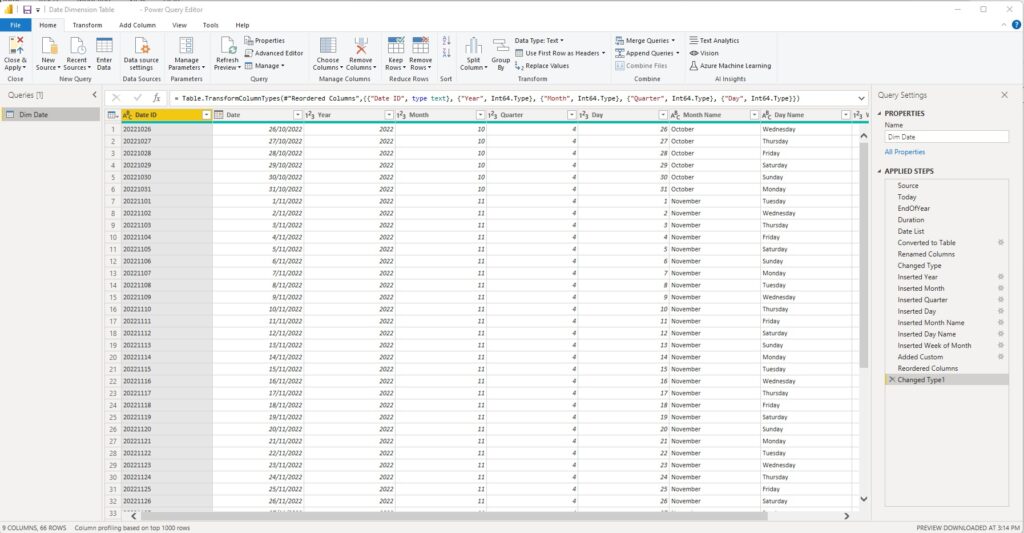
Here is the way you can have a complete Dim Date table which you can use in your reports.
Please follow the blog and read the next article. I will describe how you can add fiscal year information to your Dim Date Table.
Hope you enjoyed this blog post. Read it again and again, and watch the YouTube video on HOGOLYTICS channel to understand completely how to create Dim Date (calendar) table in your Power BI model which is a significant element of most reports.