
It is not always required to set a schedule for your Power BI reports to refresh it. You can create a button on the report and your end users can refresh data when they need.
In this post I’m going to help you how you can create a report, to monitor and trigger refreshes using Power Automate within Power BI. I’m going to describe everything step-by-step. So, follow me up to the end.
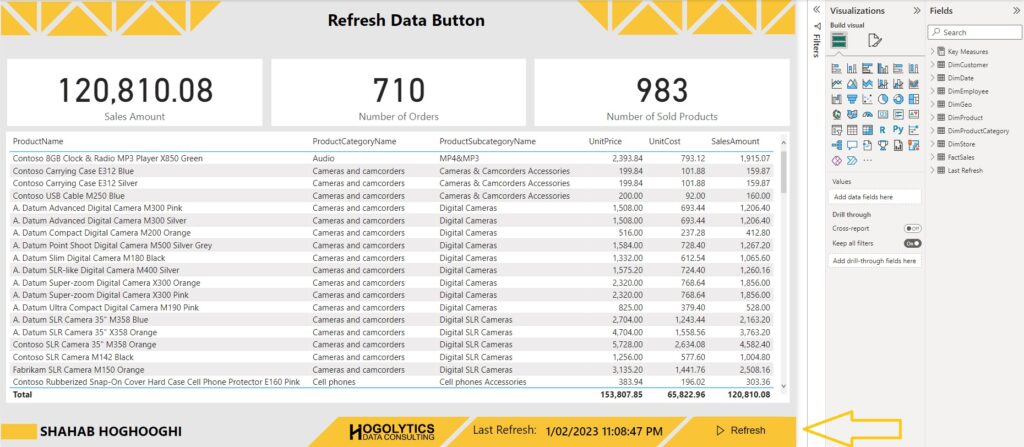
Consider that you have a Power BI report and you want to refresh it on demand. It means whenever your users need, they can refresh the report by pressing a button.
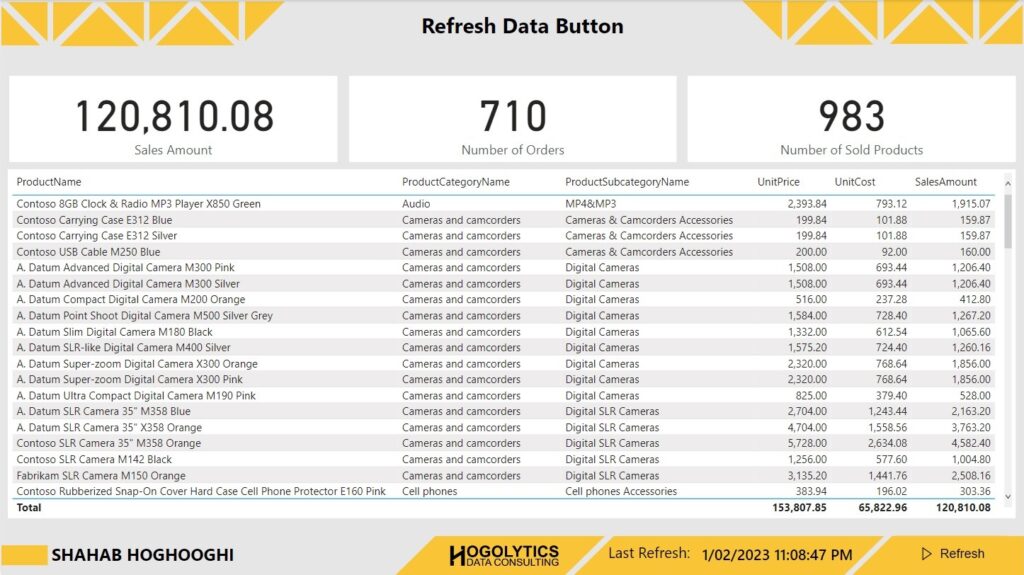
Let’s have a look at this example here. When we publish this report on Power BI Service, the developers have access to the settings for scheduling or refresh data on demand, but if the end users want to refresh this data, they cannot.
So, what I’m doing here is opening the Power BI file in Power BI Desktop on my local machine.
I use “Last Refresh” table in which I can extract the last refresh date and time to ensure that my report is up to date. If you don’t know how to create it, read the Refresh Date Time article on this blog and also watch the related video on the YouTube channel.
Create Refresh Button
What we are going to do here is adding a button to this Power BI report, to trigger the refresh for our dataset. So, as a developer you don’t need to schedule or refresh the report, and report users can refresh it just by clicking on the button.
For this purpose, I use Power Automate visual. If you’re using the new versions of Power BI you can find it within the visualizations pane, otherwise you can get it from Microsoft Power BI visuals store.
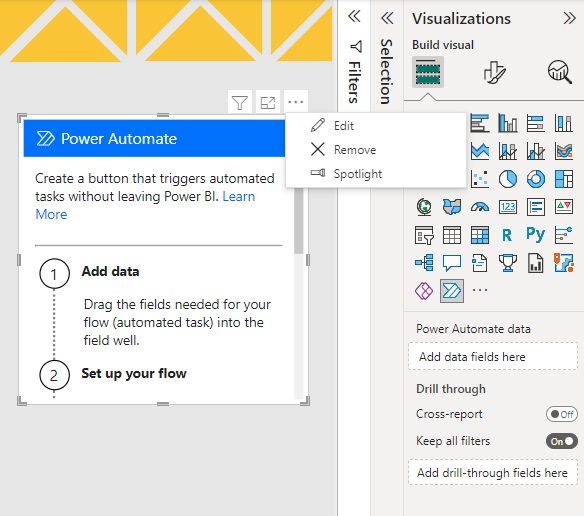
The next thing I’m going to do is clicking on the Power Automate visual. I just make it smaller and put it in a proper area of my canvas.
Then, on top right of the visual you can see 3 dots, I click on it and then choose edit.
Now, in the new window we can create a new flow. So, I press on New, and then Instant Cloud flow.
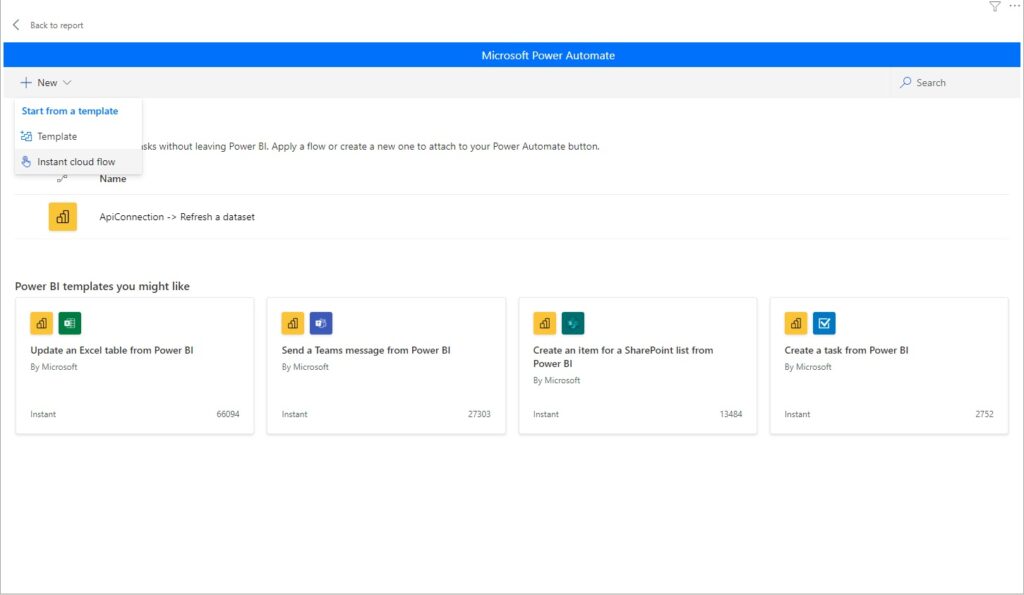
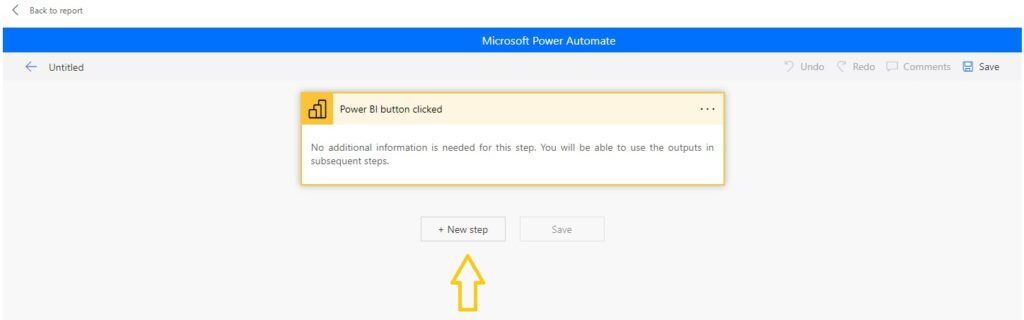
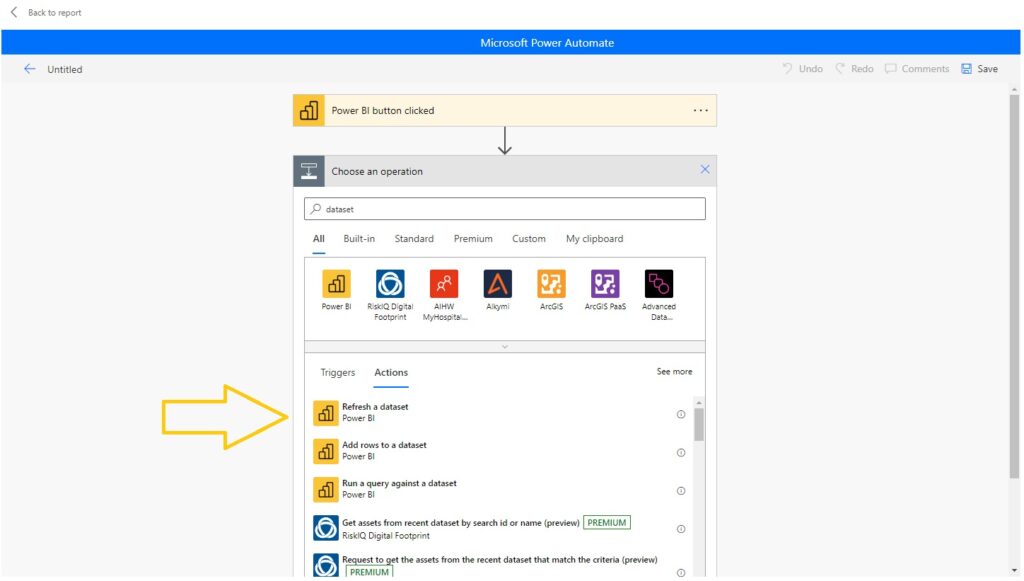
The first thing we’re going to do, when the new window opens up, is to press on New Step, and then search for dataset, and there, click on refresh a dataset in Power BI.
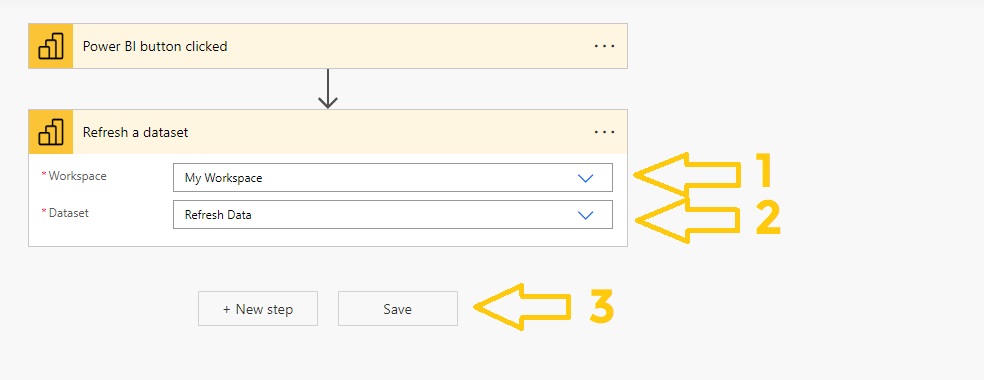
Then we should fill the two fields. First we choose our workspace, and then the dataset we’re using.
Hit Save button.
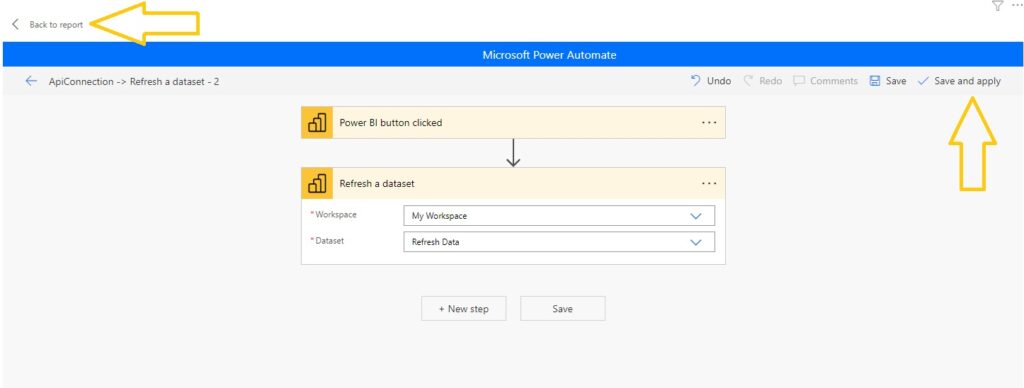
Save and apply the process from top right.
And that’s it and we can go back to the report.
Now you can see the Power Automate changed to a button that can be used to refresh our Power BI report.

Just format it to fit your report.
And then publish it to Power BI Service. Wait for some seconds to complete the publish process.
Let’s have look at the report we published on Power BI Service. And now, you can see exactly the same report and the refresh button which we can use to update our data.
TEST
Let’s test it and see how it works. So, I hit refresh.
You can see after a few seconds, the button text shows Triggered. It means the data refresh completed, and if I refresh the whole report from browser, you can see the last refresh date and time updated.

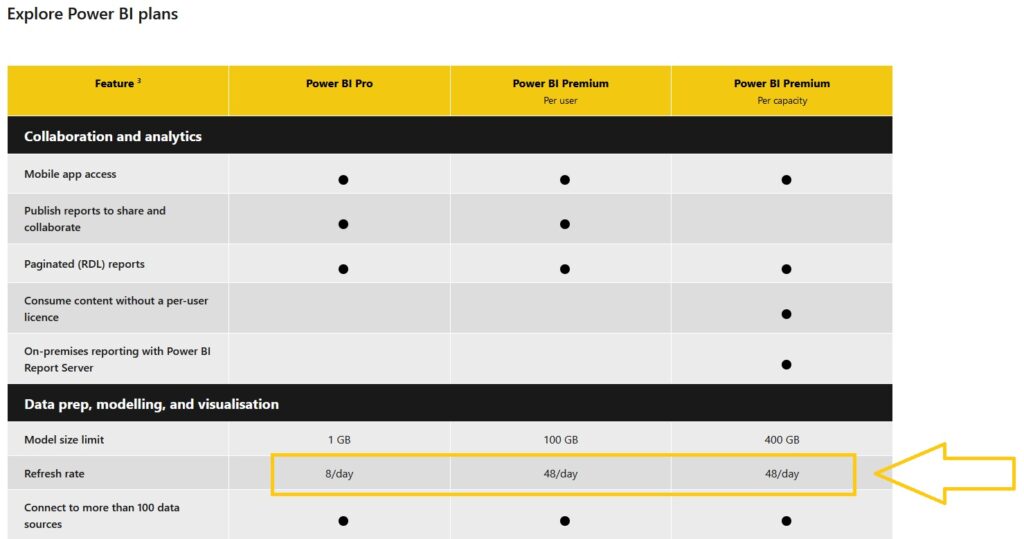
Just remember, there isn’t any difference between scheduling a refresh for a dataset or do it on demand. You have only a limited number of refresh per day.
If we have a look at Microsoft Power BI documentation, you can see you can only refresh your data up to 8 times a day if your license is on Pro, and 48 times on the Premium licenses.
Hope you enjoyed this article. Please write your comments below this post and watch YouTube video for better understanding.