
It’s absolutely valuable for your users to understand when was the last time your report get refreshed. Don’t miss this tutorial to learn how to create last refresh date and time field in your Power BI report.
Consider we have a Power BI report like this one and you set a schedule to refresh it’s data or maybe you refresh it on demand. But, your customer is not sure when was the last refresh date and time? And so they’re not confident that they can trust on your report.
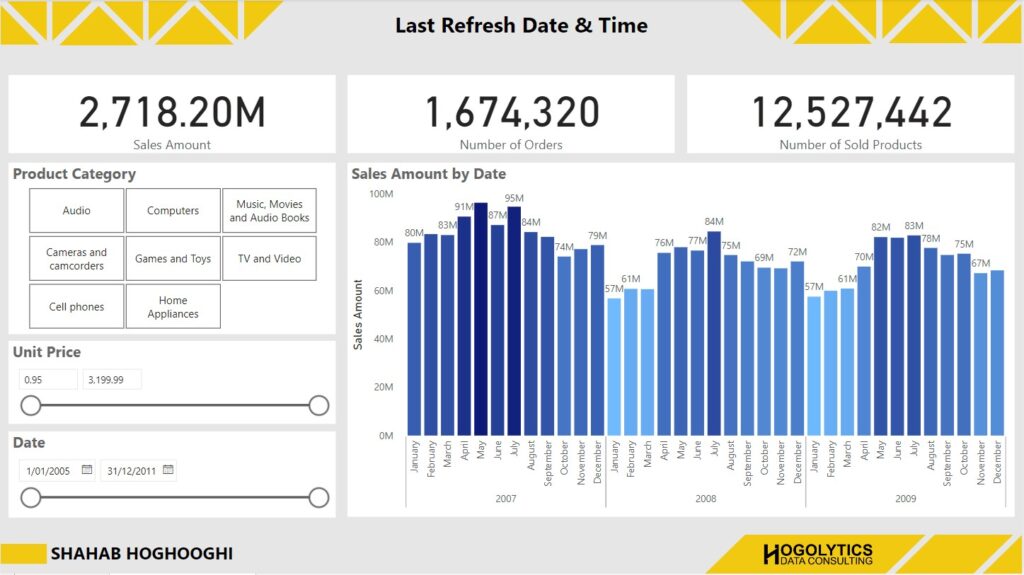
Also, sometimes there is a problem in refreshing your report based on your schedule, and then, you can immediately realize the issue when you cannot see any changes in refresh date and time info.
So, what can we do?
Correct, we can create the refresh date and time field and use it in our report to show our users when was the last time this report get refreshed.
But, How to do it?
Create Refresh Date & Time Field
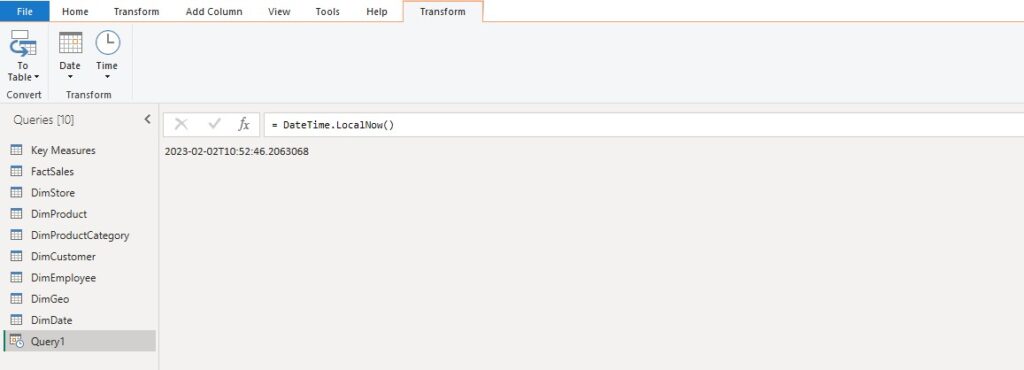
What we’re going to do is going to the Power Query editor, and from New Source, choose a Blank Query.
Then, in the text box write
= DateTime.LocalNow()And then hit the check.
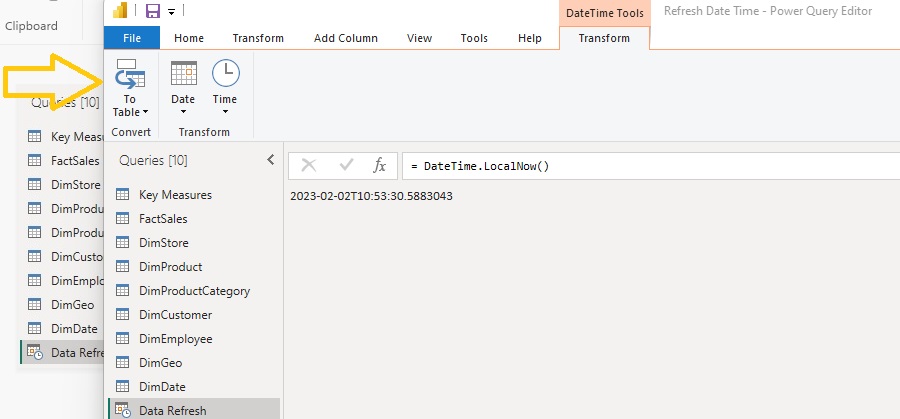
Then, I change the query name to Data Refresh.

Now, we have the current date and time, and now we should convert it to a table.
So, from top left, I press “To Table” button.
And boom!
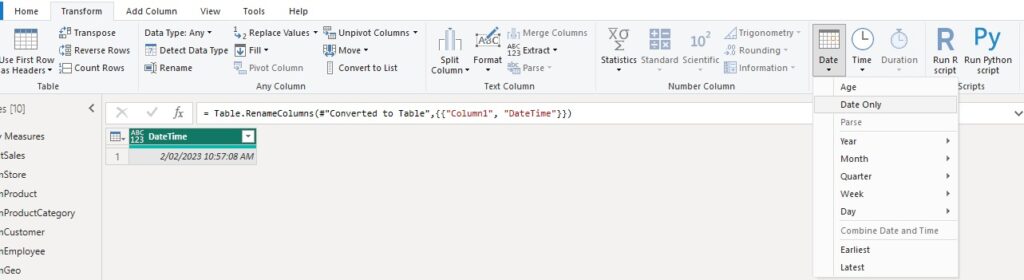
You can see the data in a columnar format. I just rename the column to DateTime.

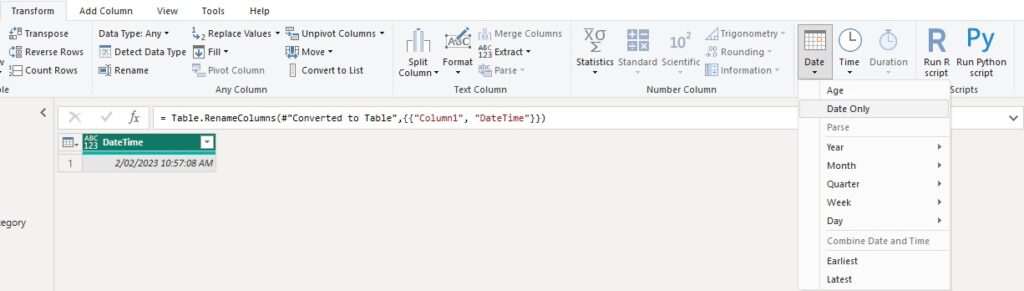
And then what I’m going to do is duplicate the DatTime column and name the column as Date. Then, I’m going to the Transform tab, and from Date & Time Column section choose date, and then Date only.
Again, duplicate the DateTime column and rename it to Time. And then, this time I’m going to the Transform tab, and from Date & Time Column section choose Time, and then Time only.
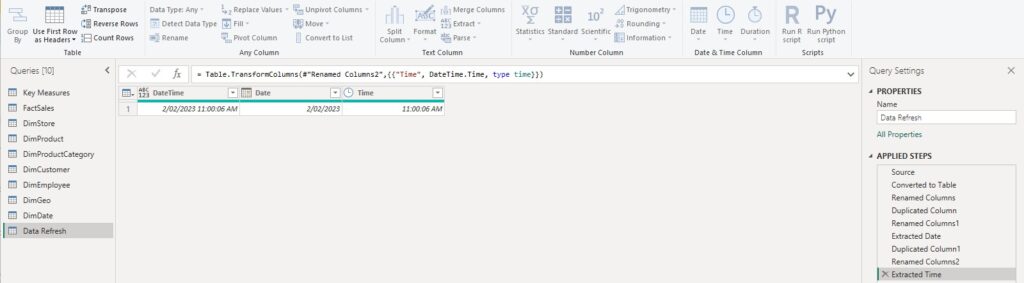
Now we have a table here, which get refreshed whenever we refresh the model.
Let’s close and apply.
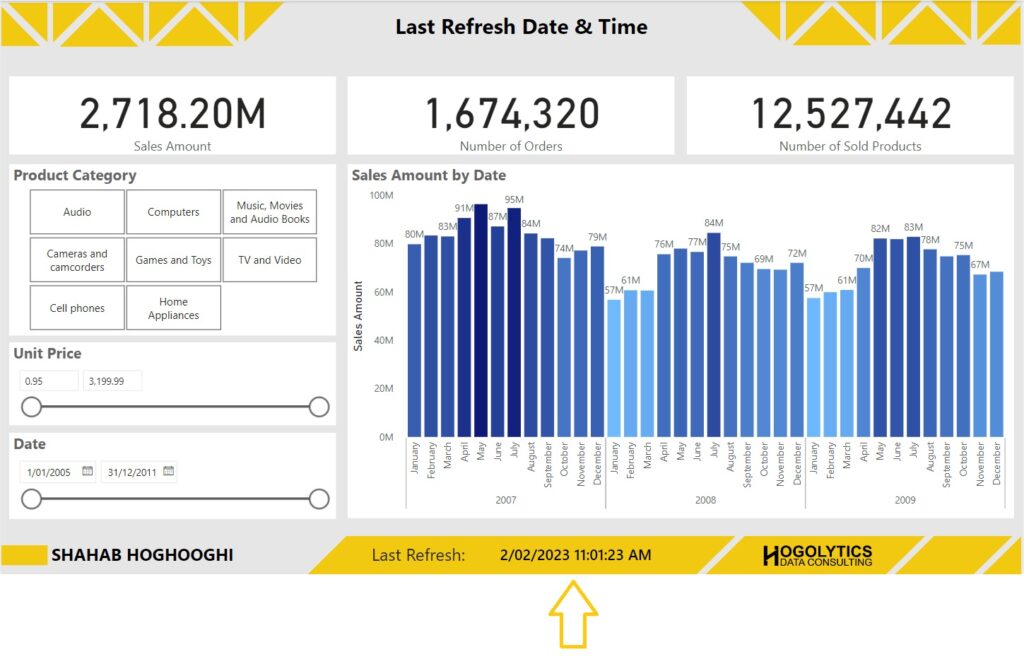
To test, we create a card, and drag the DateTime into it, and format the visual.
You can see here the last date and time the report get refreshed. And now if I press on refresh the whole model, and wait some seconds to complete the refresh process, you can see the DateTime get Updated.
Just notice that if you refresh only one table in your model, this refresh time will not get updated.
So, The Date and time info only get refreshed when you refresh the whole model. And if you’re refreshing your report in Power BI service there isn’t any problem as you’re refreshing the whole model.
Final Word
I’m curious to know what’s your thoughts. Comment it below this post.
You can also watch the related video on YouTube Channel for better understanding.