Row Level Security (RLS) is a way to restrict data in your report based on the Power BI end users. It helps to filter data access at the row level for different roles which you can define. However, it doesn’t restrict data access and users of a workspace have access to the datasets.
You can watch the video below on HOGOLYTICS YouTube Channel to understand exactly how RLS works.
For example, consider a company has different branches in Pacific, North America, and Europe. And each of these continents have their own teams. Therefore, we can create three different roles for each continent, and the employees in each continent only have access to the data in their area.
How to use Row Level Security in Power BI?
Here we provide an example for you to completely understand how RLS works. For instance, the report below shows sales amount and number of customers in different regions all around the world.
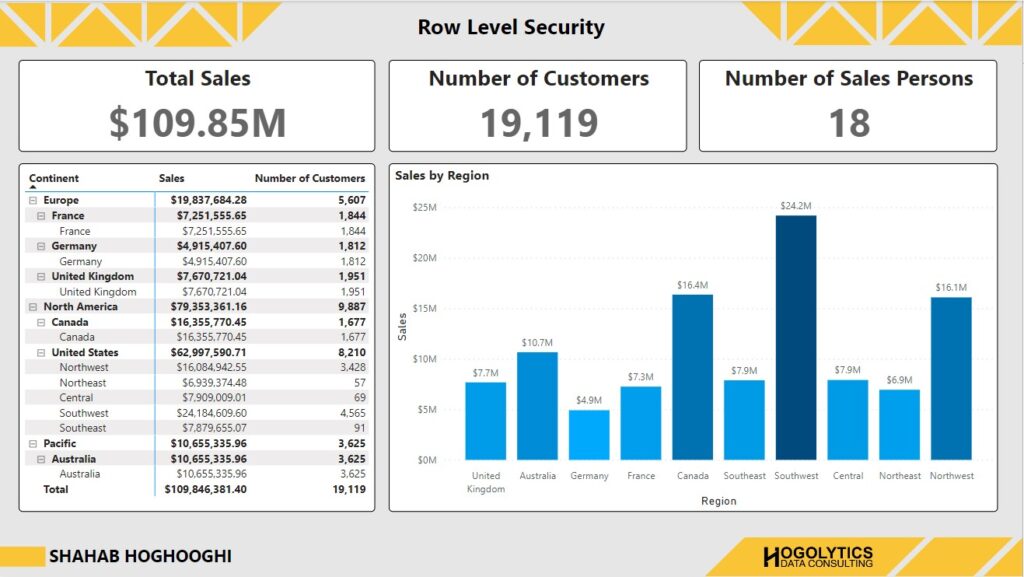
Our aim is filter data for end users in different Continents. So, users in North America can only see the information for the United States and Canada, Users in Europe have access to the UK, France, and Germany report, and Users in Pacific area can see the Australian information. The regions information is available in “Region” table which is shown below.

Defining Roles
The first step is defining different roles for the access level to the report. So, we should click on the “Manage Roles” underneath of the Modeling tab.

At the beginning, you can see no roles were defined. So, click on the create button below the Roles to create the first role.

Change the Name to “North America”. In front of the Region table, you can see 3 dots. Click on it, then hover your mouse on “Add Filter” and you can see the list of columns in that specific table which you can filter based on them.

Choose country filed, and in the DAX expression field you can see Power BI shows you [country] = “value”. Just write “United States” instead of value, and so in this way the role filters the data for the “United States”. We should add “Canada” as we want to filter data for “North American” countries. So, we should write “OR” symbol in DAX ( || ), and then write [country] = “Canada”.

Another way to write this DAX code is to use “IN” operation and just write country IN, then open the curly bracket and then “United Sates”, comma, “Canada”, and then close the curly bracket.

The easiest way in this example is filtering the data based on continent instead of countries. So, we choose the continent filter and change the value to “North America”.

Now we need to create other roles for Europe and Pacific. The same we should filter the continent by the value “Europe” and “Pacific”.

Testing Different Roles
Now we have all the three roles, and we can filter report for different users in different continents.
Let’s test how the roles are working. From the Modeling tab choose “View as” and then select “North America”.
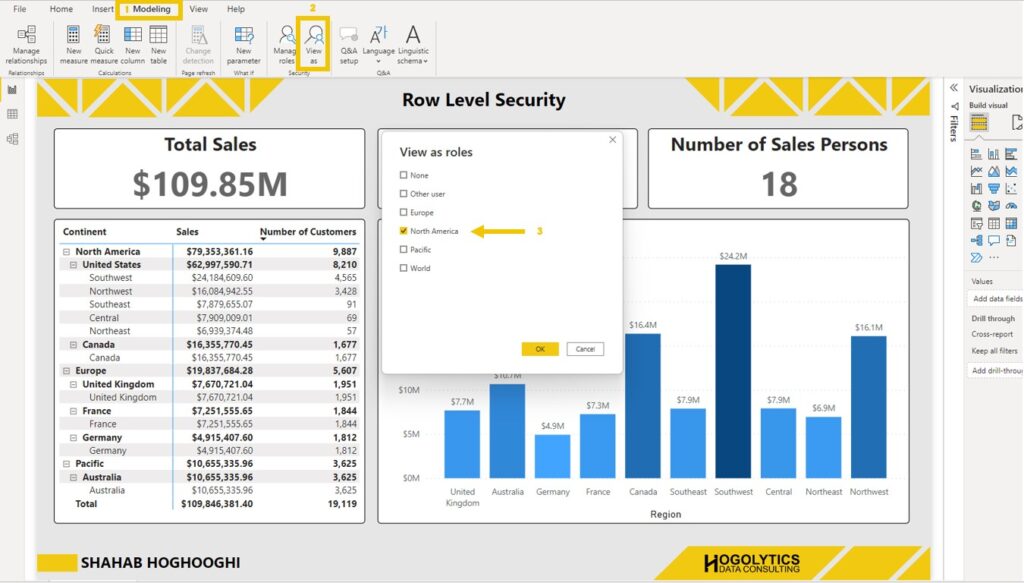
Now you can see the report is filtered for the North America.
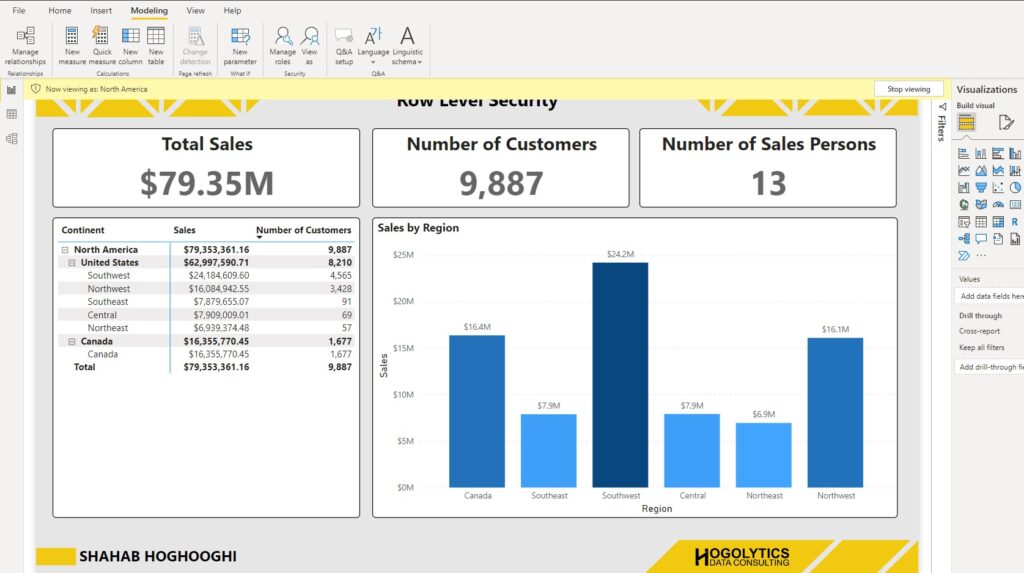
The same test can be done for the Europe and Pacific.
Set Row Level Security on Power BI Service
Now it’s the time to publish the report and see how to define a role level security for a user. Save the Power BI file and click on the Publish and choose your workspace and once the report get published you can go to power bi service.
In the Power BI Service, Open the workspace in which you published the report, go to the datasets tab, and if you hover your mouse on the specific data set, you can see 3 dots. Choose the security from the options in this list.
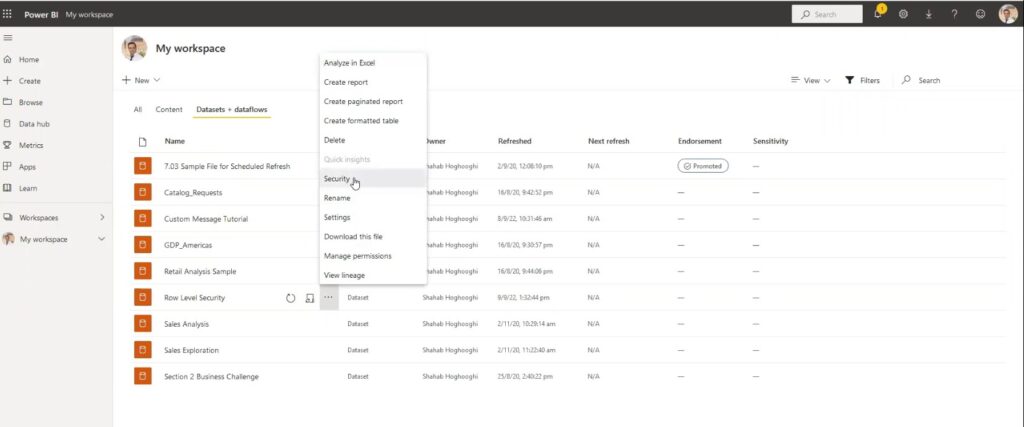
You can see the name of all roles we defined earlier. Now you can add any of the users here and add them to each of the roles you like and save.
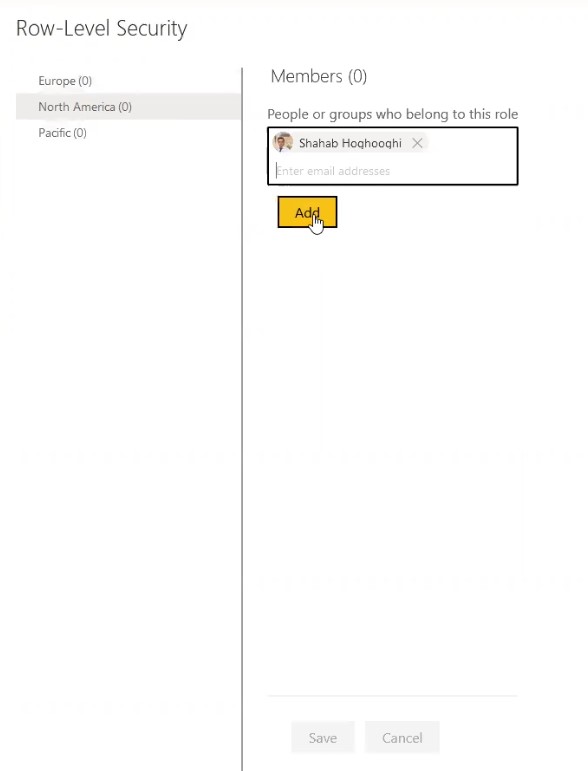
When you assign these roles to your report users, then everything is done, and the specific users only can see the data which is filtered for them.
You can also subscribe to the YouTube channel and watch more Power BI tutorials. Please follow the articles on HOGOLYTICS blog and put your comments to improve the blog.
I was very pleased to uncover this page. I wanted to
thank you for ones time just for this fantastic read!!
I definitely liked every little bit of it and i also
have you saved as a favorite to see new things in your
website.
Thank you for following my blog. Happy you liked it. I’ll try to create more interesting Power BI content. Stay tuned!